Single sign-in implementation
Creating a user-friendly way to merge multiple accounts under one login credential
Client: Bambora
Project duration: 8 months
Tools: Whiteboard, Invision
UX techniques used: user research, user flows, wireframing, and prototyping.
Enhancing the User Log-in Process
We needed to develop a single sign-in implementation that would improve user experience. The previous log-in process requires three fields: company ID, user ID, and password. Moreover, a user with multiple accounts must sign out of one account and sign in again into the next account. As the team at Bambora is working on a complete redesign of the Member Area, the first step is to design the new sign-in process and have existing users merge all their accounts into this new feature.
Problem Statement
The main problem was to find a user-friendly way to merge all of one company’s accounts under one sign-in. Multiple signings made it hard for the clients to use the platforms, and sometimes they could confuse the passwords and lose access to their user accounts.
Primary Business Goals
- To ensure easy access to the platform
- To improve user experience
- Prepare to move users to the new Bambora platform
The current log-in process requires three fields: company ID, user ID, and password. Moreover, a user with multiple accounts must sign out of one account and sign in again into the next account. As the team at Bambora is working on a complete redesign of the Member Area, the first step is to design the new sign-in process and have existing users merge all their accounts into this new feature.
The main challenge was transitioning from our current Member Area to the new design. The development team instructed us to keep the existing design until users have fully migrated all their accounts to the new process. We also had very little freedom with the main portion of the screen but could alter the iframe for the top section.


Step one is to get the users to begin the process. We designed this first step so that when the user goes to the log-in page and enters their log-in information, they are redirected to a new screen that prompts them to enter the email address to which they want to connect all their accounts. A confirmation email is then sent to the email address provided.
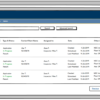
The user can then access the Member Area. To ensure the user follows through and confirms the email address provided in the last step, we added a yellow banner prompting the user to verify their email. We couldn’t add it directly to the top section, so adding it just below it and above the main section allowed us to display the information to be obvious to the user within the limitations we had with the design.
The user will find a message in his email inbox. We thought this would be a good time to set up their password for the new single sign-on. By clicking the email’s confirmation button, the user is taken to a new screen to set up their new password. This is now the email address and password they will use to log in to the Member Area. Two fields instead of three.
As the new single sign-in will allow users to access all their accounts from the same log-in, they must connect all their accounts to the email and password they selected. On the next new screen, they can start the process by entering the old credentials for one account at a time. The option to add more than one account is given to connect all their accounts during this step. To make it easier to switch to the right account when needed, the user can give an alias to the account.
Once a user has connected all their accounts, the process is over, and they can then only use the single sign-in log-in page and switch from one account to the other while logged in. On the old log-in page, they will find a link to the new single sign-in page.
If a user started the process but did not connect all their accounts yet, they will be given to opportunity to do so in a few different ways. On their next log-in with an account already registered to the single sign-in, they will access the single sign-in page. Suppose they are trying to connect to an account not yet registered yet but with an email address already registered. In that case, they will be redirected to the new log-in page, and by entering their new password, the account will be connected to the new single sign-in account.

They will also connect accounts while logged in, with a new “connect account” option on the Account Admin page. The admin of an account also can invite other users already registered with an account. Upon receiving an invitation email, the invited user can only enter his new password to have his account created for the single sign-in log-in.
Conclusion
This process took quite a bit of collaboration between Designers and Developers to make sure everything was within the capacity of the current Member Area. A similar process was later designed and implemented successfully in the European Member Area.
You can view the original PDF here: single-signin.pdf